Note: These notes and images may be downloaded from https://billspracticeblog.wordpress.com/
Introduction
This is the first year that I have been involved in teaching Photoshop.
I have learned a lot of techniques from Greg Bowden’s tutorials. Have a look at some of the sample pages on his website – (http://gct.com.au/Sample%20Files/PScs6/PScs6_ch1.pdf). Only $18.70/book. What a bargain!
The result is that I have my head filled with lots how to techniques to try in Photoshop. However, What I lack is the sense of when and why to use the different features shown in the Guided Computer Notes.
What I am trying to do now is to create the connections between all my isolated facts so that I will know the how and why and when of working with Photoshop.
What follows is one of the techniques that I understand a bit better now.
I hope to have a steady stream of these short articles for you in the months ahead. Please refer any questions to the AUSOM Photoshop guru – Pat Tasker. Or you can email me at (0woldham8@gmail.com).
Quality of the Photograph
For the purpose of this article, please start with a photo of your own that is IN FOCUS! Otherwise, you will not be able to any differences when you resize. If it looks crummy to start with, it will still look crummy after being resized.
How to simply and quickly resize your photos in Photoshop
These notes are based on Deke McClelland’s Photoshop One on One from Lynda.com or in print – Adobe Photoshop CS5 one-on-one by deke McClelland
Summary of the Steps
Here are the five steps:
- Resample off
- Set Resolution to
- 300dpi for print
- 72 dpi for screen
- Resample on.
- Type in the height and width of the resized image.
- Resize – bicubic for reduction most often used.
Detailed Instructions
Here are the details of how to resize images in Photoshop.
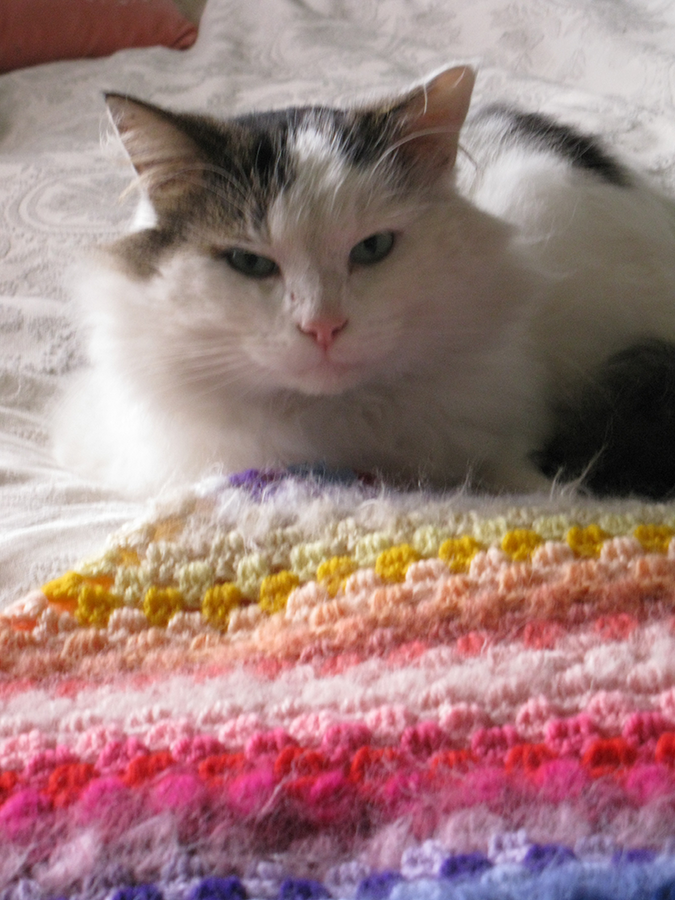
The photo that I am using is one of Fugly – a cat that hangs around the house most of the time. He is also addressed as Smelly, Stinky, Bugalugs and Puss Puss.
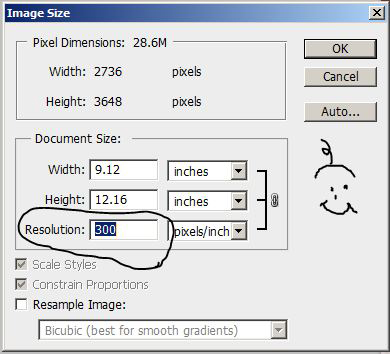
Here he is in all his glory along with the dialogue box from clicking on Image/Image Size. (You have opened Photoshop, haven’t you?)

Because I grew up with inches, feet and pounds, I still have to set my image size in inches rather than cm.
When you look at the box above, it has two measurements – pixel dimensions and document size. The only one that matters here is the document size. Forget about pixel dimensions.
Most pictures that you take these days with a camera will be able to produce anything from A4 (21 by 30 cm) to A3 (30 by 42 cm) size of a print. Most people prefer a smaller size image to print. So I will be thinking in terms of a 6” by 4” photo to put into the family album (if I actually had one).
In the image size box, the document size is shown as 15.2 by 20.3 inches. I want to resize this down to a height of 6”.
Step 1 – Turn off the Resample Image box.
If your eyes are as bad as mine, then you will need to increase the size of the image to get the details of the numbers. Or there is always a magnifying glass. The easiest way is to use Control +scroll with your mouse button to zoom in on the image.

Step 2 – Set the Resolution
Since I want this to be a printed photograph I will use 300 dpi. If you want photo quality, you might set this at 600 dpi. This is a much discussed point among Photoshop users.
Note that when you change the resolution to 300, the height and width of the Document size change with it. Do not worry about this! Just accept it. As Dick Johnson says, “Trust me!”
Step 3 – Turn the Resample Image back on.
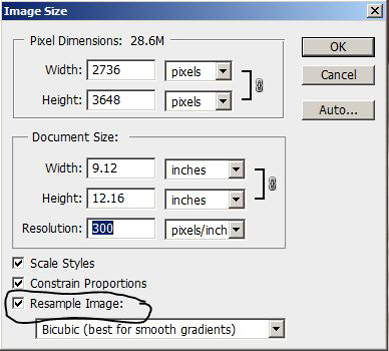
Step 4 – Enter the height /width.
Since I want the new size to stay in proportion, I only need to enter one of the new dimensions. In this case, I typed in 6” and the width was done for me as 4.5”.

Step 5 – Selecting the appropriate formula (bicubic, nearest neighbour, bilinear, etc.)
Click OK! And you are done. Hopefully, you have resized your photo and it looks good.
Here is the final shot of Fugly resized to a 3” height so that it fits into the magazine article without taking up too much space.
Conclusion
Was this any help to you? Have you actually tried to use it? How did you go?
If you are wildly happy, please write a comment on my blog to that effect. Better yet, come up to me in the meeting and say, “Bill, I liked your article and it was a big help to me. Thank you. When is your next article?”


Bill,
That was such a wonderful article.
Mum
Sadly comments from ‘woldham’ but signed Mum lack credibility.